Sunday, October 20, 2013

Rocktoberfest Taste Test

This beer was a bit on the outside of my comfort zone because of the pumpkin spice. Im not a fan of spiced or flavored beers but I wouldnt turn a pint down either. This brew was strange because at one week in primary it did not taste right. At two weeks in secondary, it started to taste like beer but it was still a little bland. 
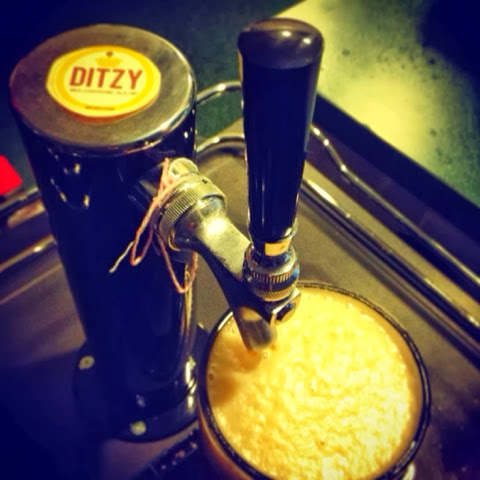
It went into the keg at 21 days for a three day carb at 28psi. I decided to sample it about a day early to make sure it had matured to a drinkable batch. It had. 
Strange beer though, it starts as a rather bland ale and about a second after you swallow, the pumkin hits my nasal senses and the sip completes. This is the first beer that had two stages of flavor separated into phases. Weird. I think its naturally undercarbonated at just one full day on the Co2 so I will retaste when it is zinging with bubbles.  Very drinkable. 


Sunday, October 13, 2013

A Good Smoke

The JR Cigars house brand is a good smoke. Whether you have the catalog or visit them online, they give you their alternative to the best brands out there. I find that for the price, their house brand won't disappoint. Enjoy. 

Oldham Ale Chili


Oldham Ale Smoked Chili

INGREDIENTS
80/20 ground beef
Chili beans in sauce 
Black beans
Jalapeño ranch style beans
Bell pepper
Yellow onion
Crushed tomatoes
Tomato sauce

SPICES
Salt/pepper
Worcester sauce
Montreal steak seasoning
Mexican taco sauce (Tapatio)
Hot Mexican chili powder
Regular chili powder
Brown sugar

Ale of choice

This recipe like most of mine comes with little or no measuring instruction. Depending on serving size and mixture preference (bean ratio to meat) you can tailor to your liking. Here are the steps.

In large chili pot, crumble ground beef and start to cook. As the beef becomes about half cooked, add tablespoon or so of both chili powders. Stir and continue to cook. Add salt and pepper to taste. 

Add 1 chopped onion and 2 bell peppers and continue to stir until beef is medium. 

Take off heat and add large can of tomato sauce and two large cans of crushed tomato. 
Incorporate mixture (no heat) add beans making sure to strain all beans from sauce exct the chili beans. Add them to the pot in sauce. 

Once blended and stirred, add both chili powders until desired spicy/heat value has been reached (your opinion). Add Montreal steak seasoning until it's tasted in each test. Add one cup (or to taste) of Worcester sauce. Add 1/2 cup of Mexican taco sauce(Tapatio). 

Start with one cup of brown sugar and continue adding until sweetness is reached to compliment the spice (heat). 

Add 12 oz of Ale

Place entire pot into smoker with your choice of woods for six hours at 275. Remove and let stand for 30 minutes before serving. 


NNB Home Brew Tasting Event

A Hydro&Brew sponsored home brew tasting party was held at the Northwest Nano basement brewery on October 12th. Some of the best home brewers from the region came out, growlers in hand to participate and govern our first ever 10 gallon batch of brew. As uncomfortable as events can be when they are one, not established, and two, no one has met yet, this jumped off great with introductions and favorite recipes. NN had the smoke house lit with cherry smoking a pot of Oldham Ale chili for hours as the brewers rolled in. Our sponsors, Jason and Jenny from Hydro&Brew brought the finished Oatmeal Stout and Baltic Porter from the beer day they hosted at the store. NN had its offering of Oldham Ale for the group to try and  critique. 

The second part of our day was running our first batch of a 10 gallon recipe through our newly purchased twin burner rig, an Imperial Nut Brown, we are calling, "Nutzo". Twenty six pounds of grain for the mash tun to convert. More on the brew later...

As the growlers came out, so did the tasters including myself. Our most senior brewer brougt this gem he called green as it had a pouch of fresh hops sitting in the bottom of the beer. Now, write this down, I don't like hoppy beer. I love hops, just not IPA's on steroids. So I grabbed a taster glass so I could take a sip, and set it down to rinse my mouth out with Ale. As I smelled it, I couldn't help but notice a pineapple note mixed in with a flowery onslaught of hops. As I tasted it I was surprised by the complex, fruity (but not flavored) aroma that seemed to permeate my nose and eyes as I swallowed a hesitant mouthful. It was the most complex beer I have ever tasted. It was the best IPA I have ever drunk up until the brewer reminded me it was not an IPA, rather an APA or American Pale Ale. Even better as I am in full support of revitalizing American brands in every part of our lives. 

I would say the Oldham Ale Smoked Chili was a hit as was the buffalo chicken dip and a cream cheese thing with bel peppers and ham chunks. Our brew den was tested both in ambiance and functionality. Three taps, a keg cellar, a shabby sheik humidor and a vintage record player spinning ACDC's iconic, Back In Black as the night wore on. 

Finally, the 10 gallon batch and the tutoring session I received from the attendees who can seriously brew beer. I would say my biggest confusion was around the sparging process and delicate nature of setting the grain bed. We (Jake and I) had previously treated these steps as "hurry up" sections of what can become a long process if you are brewing at the end of the day. Once they slowed me down and walked me through everything from the vorloff (sp) to setting the grain bed, I felt like the mash efficiency was rising as we continued to sample our brews and smoke cigars. 

The 1.080 OG
After pulling a test tube of post boils wort, I waited for it to cool to 65 degrees and plopped in my hydrometer for an original gravity reading.  1.080 right on the line!  The highest OG ever for our brewery. This small victory was conflicted with a slight error in measuring boil off and we ended the boil two gallons short of 10. So we will keg five and pull a special 3 gallon batch for the growlers. 

Join us next time for a taste test and review of the recipe!


Wednesday, October 9, 2013

A Scotchy Trip to Gotham

Day two and three of a business trip to Gotham landed us in the bowels of both Jersey and New York for some interesting business related to the sum of all retail fears. One thing about a business day in either location is the time it takes to travel around from meeting to meeting. Throw in lunch and a business happy hour, and it's a 12 hour day. New Yorkers are so maxed out with available time it's a small logistical nightmare everyday. 

Finding a good scotch is like finding a taxi, there are a bunch of choices and some are better than others. The two we tried on back to back nights were Cragganmore 10 and Talisker 10. Both were top notch with a major difference in smokey wood flavor in the Talisker. Cragganmore was smoothe and delicious. Both bottles were accompanied by La Gloria Cubano Series R Maduros and Bolivar Cafradias.

Our third night was the topper, it was the kind of can ride where you know your probably going to be late for the next meeting but somehow the cabbie pulls off the impossible and gets you to the curb in time and for less than you were anticipating. My buddy piloted his 52 Pacemaker from Miami to Libert State Park for this view everyday and night for the foreseeable future. So naturally we took advantage of location location location and socialized after a full day with government officials in Gotham. Loved the vibe with perfect Fall temps and a bottle of Jack as the sun set on the worlds foremost skyline. 

The end of our night was perhaps the greatest restaurant vibe I have ever experienced. This is the view from Liberty House in Jersey at the marina just outside Liberty State Park. Exceptional menu from sushi to steaks and again, another healthy Scotch list. After dinner we walked down to a private fire pit for hosted marshmallow roasting and home made chocolate ice cream.  On the desert menu were four top shelf cigars offered. The irony my buddy loves to mention is he has a 52 foot yacht with this view for a third of what it would cost for 600 square feet with a view of Jersey.


Sunday, October 6, 2013

A Cigar And Some Shine


Occasionally, I have to work and this weeks trip takes me to the Big Apple for meetings.  As I was trying to understand the format of my blog, I conveniently decided that home brewing was the primary focus but travel and leisure when it involves beer or cigars is permitted. Embarrassingly, it's taken nearly 46 years to actually get here so yes, I'm an NY virgin. First stop on a Sunday is JR Cigars in Jersey!  

Heaven.  Wow.  Have you seen this place? I got lost in a aisle trying to figure out what not to buy. It's also cool to grab a cigar from the desk and smoke it while your browsing. Once my bag was filled, it was off to the attached bar and restaurant, cigar still in hand for a couple of pulls on the Boddingtons tap. The New York Football Giants were playing and getting killed, so the packed facility populated with old school mobsters and Jersey types took a while to navigate.  Once seated we flipped the pages of an incredible and cheap food menu. I love grub that comes in mounds and cost $6.95. At least 21 bottles of scotch lined the bar and as we transitioned the empty plates back to the kitchen, we partook in some Cragganmore and yet another stick. Being a Sunday in Parsippany, we closed the place at 6pm and headed back to the Hyatt.

Surprises tend to ruin a travel day but sometimes a thoughtful colleague can close the day one festivities with good judgement. As the flask came out, so did some snifters from the armoire.  Apple Pie Moonshine came pouring out coating the glasses with a thick film.  Amber colored and smelling of apple pie and jet fuel, I was hesitant.  Every time I have had some banjo playing hillbilly hand me some shine it was almost impossible to swallow. But I trusted my friend and all he said was, "just try it."  Apparently high end shine from pro stills is somewhat of a delicacy because this shit was killer. Not like tequilla in Tijuana, like the scotch we just drank-great. It reminded me of ether with baked apple pie. But extremely drinkable like high end Brandy. I was so surprised I inquired as to the legalities in ordering some mason jars from the shiner.  I'll get back to you on the pursuit of the shine.

Cleanliness Next to Godliness?

The most important responsibility in crafting great and consistent beers is perfect sanitary conditions. There are two stages to worry about. First, is the boil.  Since boiling at temperature is sanitary, few if any steps are needed to maintain a bacteria free brew desk. However, because small particles and residue can introduce off favors into your beer, please take the time to prepare your brew kettle and tools prior to starting. Second and most critical is the fermentation bucket. Once the boil is over and the beer has cooled, the game begins. Even oxygen can corrupt the beer. Anything set to touch that liquid needs to be sanitized in Starsan or the like. 
There are a few sterilization powders and liquids used in this industry that are food grade and safe. Always work with a 5 gallon wash bucket filled with 1-2 gallons of luke warm water mixed with your favorite sterilizer. This method allows you to pick and pull any tool or hose repeatedly from the bucket and remain crystal clean. I chose to wear sanitary gloves all the way to my elbow during the transfer phase from boil kettle to fermenter. This way even an arm hair will not find its way into the beer prior to fermentation. 

Batch 3-Oldham Ale, 8.5% ABV

Batch 3 was an all grain English IPA base with an additional step in fermentation in which French Oak chips are added to the beer to infuse it with a hint of smokiness. Another tweak we attempted was to lessen the exposure of the wort to the amount of bittering hops the recipe called for. Our goal was to remove some of the IPA characteristics while adding a note of roasted wood only noticeable in the finish of the beer. We also mildly boiled this wort. I took extra time and care to keep the boil barely rolling to lighten the overall color of the beer to the extent that I could. This is what is awesome about home brewing-total control. 

The beer was carbonated at 28psi for two days then I dropped the psi to 8 for a day and started pulling pints. Once again this beer impresses me. It's natural fruitiness without seeming flavored (like a Blue Moon) topped with a spongy, thick head and a reduction in sharpness from our attempt at taming the hoppiness. Huge flavor for an English and I think we could have gone to two ounces of French Oak instead of one. The barrel flavor is there as a hint rather than a primary compliment. 

This is the first batch that we will store in commemorative growlers for an aging experiment and some unexpected gifts to friends. 

Oldham Ale is named after the most beautiful street in Bella Vista, Arkansas. 


My Trip To Golden Colorado

I usually don't take pictures of myself, I think my kids call it, "selfies" or something inheritantly millennial. I was able to get a VIP look at Coors in Golden, Colorado recently and after I had started my home brewing empire. I don't like Coors, never have but this is one cool tour if your ever in the area. When they say it's all about the Rocky Mountain water, they ain't kidding since a river starting atop the peaks runs right into the plant. 

Inside the massive complex (second largest in the world), the process of making beer is remarkably the same as in my basement. Water mixed with grain at temperature, hops and fermentation. Below is a picture of years worth of hydro meters used to measure the gravity of the beer to ultimately determine and manage alcohol content. 

The outbound train from the middle of the plant to a 7-11 near you. 

The master control room. 

My tour, like everyone else's ends with a tasting room. Adolf had written down a pre-prohibition recipe way back when that was dug out of the archives and named, "Batch 19". It was being served today and it was very good for a Coors product. Did you know that Blue Moon was created here and continues to be brewed at Coors?  I love Blue Moon, so does this mean I've been a Coors fan this whole time?  


Should You Get Into Home Brewing?

If you love beer and enjoy cooking or barbecuing then yes.  In this short post we will talk about the costs and the hobby. So, I love to cook, hate to bake, can smoke a used tire and it will taste good, love cigars, pro football and friends. Our family is built around the backyard get together. Beer has always been a part of our lives. Way back when a Lowenbrau was a craft beer, we filled our Coleman coolers with beer. As the micro brew revolution hit we were there as well. Growing up in San Diego, we were lucky.  I remember stopping by Ballast Point and walking around the brew house unescorted, tripping on the young brewery.  Or heading up to Stone or Karl Strauss to pick up a free keg for a police golf tournament. The more the six pack costs, the better it must be right?  

Micro brews have saturated the marketplace so severely, it's hard to know what's good or different anymore. I was at a Yard House in Denver the other week for a conference. The restaurant was connected to my hotel (not good).  I drank there all week and can't remember ever settling on a beer I would order again. Either too hoppy for me or 10.5% ABV and $11 a pint.  Home brewing is somehow controlling my appetite for a good beer while controlling the spend. There's also something elitist about something I created. It's naturally better because I made it. So what does it cost to brew five gallons of beer? About $30.

Here's a rough go by for investment all the way to drinking your brew.

Home Brew Kit $139-$179
Brew Kettle $59-$129
Ingredients $24-$50
Bottles $20 (24 pack)

What is seldom addressed in a sale of a starter kit is bottling or kegging your batch. All kits will come with bottling equipment but usually not the bottles. Bottles are cheap though and the best way to age your beer while making it portable for friends and neighbors. Bottling is the most time consuming part though and adds at least a week to hour brew schedule before you can drink your masterpiece.  What I love about kegging ($200-$300 turnkey) is from brew day to your mouth is 14 days and in a pitch depending on style of beer you could probably force carbonate a batch at 10-12 days.  

The Brew Club

It's a typical Saturday morning after the work week. Nine hundred errands, a needy but deserving toddler screaming from his baby seat strapped to the middle of a Ford Expedition about going to a park to swing and slide.  And at 10am, the first ever brew club meeting hosted by Hydro&Brew... Typical dad deal where I commit to showing up but between the wife rolling her eyes and a trip to Sams Club, I become seriously late and have to send an email to my new best friends, Jason and Jenny that I will be tardy. I hate being late. But when I arrive, it's awkward.  There's a home made still in the parking lot brewing something and a small group of enthusiast in the store shooting the shit.  I head for the store and immediately get a recycled bottle of Sierra Nevada  handed to me with a disclaimer that it was actually a Baltic Porter made by some dude.  I'm not hesitant or afraid, rather excited to pop the top and see where I fit into the competition of brewing. It was delicious!  I questioned whether it was even a home brew?  Rich, malty, hints of coffee and almonds... Perfect!  It was for real with ABV also, like a vodka nasal finish to every sip.  Funny how a couple of sips encourages social interaction with strangers. I learned a ton just shooting the shit with these backwoods brewers. Every dude had his own personality and contribution to the craft. There was the purist who only brews one gallon batches. The chemist who doesn't even brew but knows the ph of every drop of water and wort. The naturalist who was just driving by and saw the banner and decided to stop. The pessimist who complained the entire time about prices and quality. And then me, who didn't give a shit about the vibe, rather seeking knowledge and business perspective to the industry. 
I loved the home welded brew stand and the keg kettles. Reminded me of the area and the lineage of shiners and thugs indicative to the region. But for real, this was a serious set up. A double burner, gravity fed all grain still, ready to turn out 1.070 OG all day long!  Notice the water filter in the lower left?  Nothing but a garden hose to fill the hot liquor tank (HLT) with perfect soft water to convert the grain.  As ghetto as the black cooler looks, it's tremendously efficient as a mash tun. As 175 degree water mixes with the grain, a nine to fifteen degree cooling occurs allowing for a 158 degree hour long sugar fest to make wort. Some added copper welds contributed to the backwoods aura. 

Two five gallon batches were born today as several new networking connections were made in this small but vibrant zymurgists culture. 


Saturday, October 5, 2013

Batch 2- All Grain Brewing a Hefeweisen

I had been back to Hydro & Brew several times to check in and gain some more knowledge on brewing. The local shop is owned by a husband and wife team who both brew and indoor grow so selling their modest product line was no problem. Jennifer talked me into an all grain batch which scared me a bit due to e need for something called a mash tun. Sensing this was going to take me out of my rookie comfort zone, I went to You Tube to browse DIY all grain videos using mash tuns. I love YT. In three short videos I was comfortable with the process and ready to drop another $135 on a cooler based mash tun made by Hydro & Beer. 
Using all grains relieves the process of using the thick, sticky malt extract. As the grain soaks in 158 degree water, the sugars sweeten the water making wort. After about an hour of soaking the crushed grain, we have made our own fresh extract and are ready to boil in the same manner as before with staged infusions of hops. The recipes, and there are hundreds if not thousands are based on the types of grains. We have chosen a Hefeweisen recipe to use as our base but we are going to tweak it a bit by reducing the sugar content to give us a lighter ABV (alcohol by volume). Ok, ok, to be honest we didn't crush our grains well enough and only realized about 80% of our conversion causing a light OG (original gravity). As we proceed in future posts we will break down the technical and chemistry side of this process but for now I want you to know how easy it is to brew world class beer at home.  
Again we had put the cart before the horse with branded logos for our batch 2 before even tasting it. But confidence or arrogance (not sure which) won the day and besides batch 1 was killer and didn't last long as it was premiered for Monday Night Football and poof, the 5 gallon keg was dry.  Hillbilly Hefer was coming out of secondary fermentation at 14 days and looked perfect in color and body. In my many hours flipping YT channels, I had learned to sample the warm uncarbonated beer to make sure it was beer prior to kegging it. Batch 2 smoked batch 1 but there's something not quite right about warm beer. 
Even non beer drinkers loved this Hef. It was light hearted and crispy with significantly more carbonation than Ditzy. With or without Lemon, this brew was inspiring and all grain. The great mystery of all grain and the use of equipment that was foreign to us (mash tun) had been broken down into a simple, step by step process that kicked out a serious contender. 


The Mash Fest #1


Pursuing the first batch meant re reading a home brew book to try and remember key processes that turn out good beer. Number one on the list is perfect sanitation followed by good water. The rest is semi easy, like baking or cooking; ingredients and timers to help us along. Water comes to a boil and liquid malt extract is added with stages of grain and hops for about an hour. Once complete, your kitchen and most of the house smells like warm roasted malt, an aroma I happen to love. Pitching the yeast is a bit tricky because the boiling wort (wert-Unfermented beer)  has to cool down to 70-75 degrees before the yeast will activate against the sugars and provide the proper buzz most beer drinkers seek.  As the wort enters the fermenter (plastic bucket) and we sprinkle the dried yeast over the top of the brownish tepid mixture, it's off to a dark place for seven days for what is known as the primary fermentation. 

The first batch went off without a hitch although we were slightly late with one of the hop strains and didn't get the timing right on another.  Kitchen was a wreck as I remembered but mostly due to large vessels and pots combined with many tools, tubes, thermometers and siphons. In future posts we will talk detail and process in depth but for now let's get this batch, cleverly named, "Ditzy" in a pint glass and down the hatch for a taste review. 

Now we went a little over the top and kegged our first batch before even knowing what it tasted like. We will cover kegs and bottling in future posts but for now let's assume the keg and tap along with the proper carbonation magically appeared. 
The first thing we noticed was our blonde had a little Beyoncé in it!  A blonde ale should be blonde in color. What I learned was the boil was too vigorous and caramelized the extract to a darker color. Note to self.  The head was perfect, very Sam Adams like and remained atop the glass for the entire drink. The Ale was awesome!  Not a single artifact like I remembered from the past reminding you that it was infact home brew and not Sam Adams. Hoppy, malty with a dry finish and light carbonation much like a Boddingtons Pub Ale. We had done it!  Excitement reigned as we went back to the tap over and over joyous that we were drinking kegged home brew in our basement. A cigar later and we had planned out our entire nano brew future including brew schedules, beer types and a merchandise line. 

Welcome

So it's been 20 years since I last destroyed a kitchen with extract and water trying to forge a drinkable home brew. I have no idea what triggered me to start again except the love of beer and creativity. It might have had something to do with my commute as well. I happen to drive by a small business in the very northwest tip of Arkansas called, "Hydro & Brew". I stopped in one day to see what progress the home brew world had made since 1993 when I last stirred the pot.  Also curious was the name "Hydro" because where I grew up, California, the word hydro meant, "Indoor Grow" as in marijuana.  Jennifer was manning the store and after a half hour reindoctrination to both industries I had whipped out the plastic and loaded the SUV with a complete home brew kit and the ingredients for an Imperial Blonde Ale. 

The industry and technology had progressed to the point (according to Jennifer) where the finished (nano brew) product was indistinguishable from major label micro brews.  Micro brews are no longer micro rather macro businesses with major commercial breweries supporting giant distribution chains around the world.  But what is a nano brew? Well, it's less than a micro brew and a growing fad amongst home brew enthusiasts. Of course, a margin of error still exists and if the home brewer (zymurgists) falls short in key steps in the kitchen, the drink ability will be less than your buddies are expecting at the basement happy hour. 

So why not? Let's fire up the stove and see if my son in law and I can get the temperatures right and make a drinkable Imperial Blonde Ale.